My Clinic - Experience and Product Review Part 1


Please subscribe to my youtube channel and watch my latest video 

Thank you.
Much Love !

REVIEW:Tarte Tartelette In Bloom Clay Palette Review

Tarte Tartelette In Bloom Clay Palette

Resepi Brownies Kedut

Resepi Brownies Kedut


Resepi : Pavlova


Bahan-bahan
4 biji telur putih (gred A)
1 cawan gula kaster (boleh kurangkan)
1/2 sk pure extract vanila 
1 sk vinegar/lemon juice
1/2 sb tepung jagung

KLFW17 : Innai Red

Innai Red brought balloon sleeves, tulle skirts, and elegant silhouettes to the runway


I totally fall in love with all of these collections !!

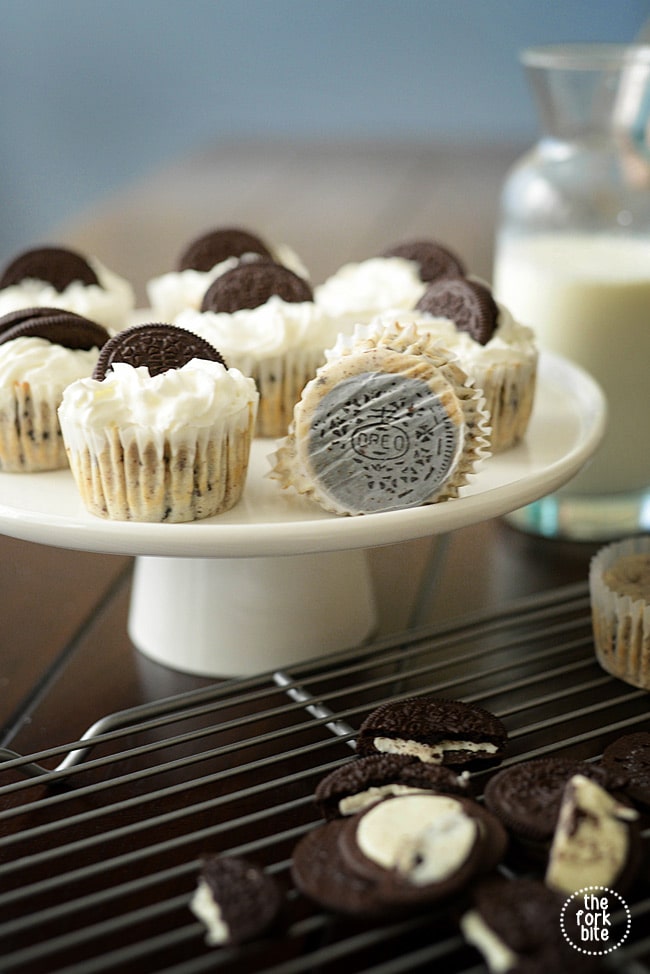
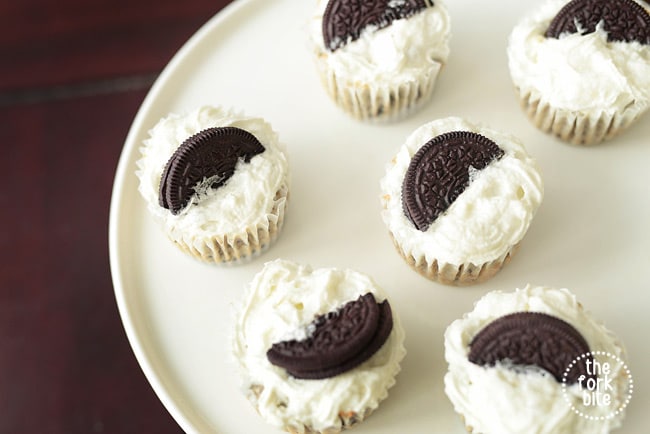
Easy Oreo Cheesecake Cupcakes Recipe

Image result for oreo cheesecake cupcakes recipe


Ingredients
45 minutes
12
579.76 kcal
  1. 42 Oreos, 30 left whole and 12 coarsely chopped
  2. 2 pounds (32 ounces) cream cheese, softened
  3. 1 cup granulated sugar
  4. 1 teaspoon vanilla extract
  5. 4 large eggs, lightly beaten
  6. 1 cup sour cream
  7. pinch of salt
Instructions
Prep
20 minutes
Cook
25 minutes
Ready in
45 minutes
  1. Preheat oven to 275°.
  2. Line muffin pans with liners. Place 1 whole cookie in the bottom of each liner.
  3. Using an electric mixer, beat cream cheese at medium speed. Add sugar gradually, beating until combined. Beat in vanilla.
  4. Drizzle in eggs, a bit at a time. Beat in sour cream and salt. Stir in chopped cookies by hand.
  5. Divide batter evenly among cookie-lined cups, filling each almost to the top.
  6. Bake, rotating pan halfway through, until filling is set, about 22 minutes.
  7. Transfer to wire racks to cool completely. Refrigerate at least 4 hours (or up to overnight).
  8. Best served really cold! Garnish with fresh whipped cream and crumbled Oreos if desired.


Image result for oreo cheesecake cupcakes recipe


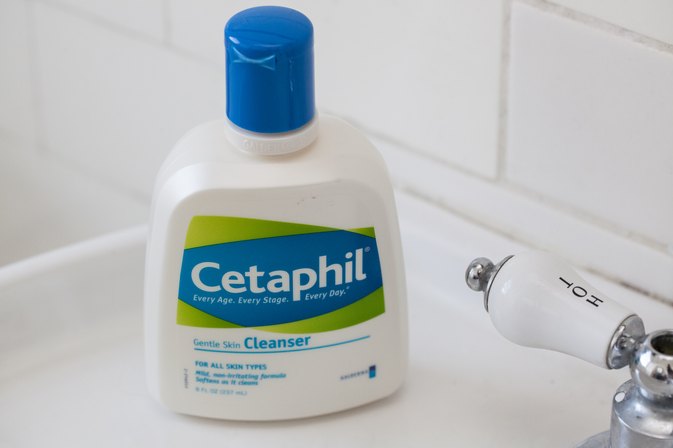
Cetaphil Gentle Skin Cleanser Review

Cetaphil Gentle Skin Cleanser Directions

Hello. This is my first post on IMBB and it’s about Cetaphil Skin Cleanser. I think it is important to know where the info is coming from so before you read this post, some important things- I am 21 years old. I have normal to oily skin which is prone to breakouts. Although recently this has reduced, my breakouts are now only 2-3 pimples every monday
What Cetaphil Skin Cleanser Does:
  • It leaves skin squeaky clean.
  • Doesn’t give you that dry, stretched feeling post washing.
  • Since it retains your skin’s ph balance, no need for toner unless it’s the astringent kind.
  • Its very gentle and great for skin with acne or sensitive skin.
  • It won’t cause your skin to break out or react.
  • People with dry skin will love this product as skin will not flake or get dry with this.
  • It also removes traces of make up, even waterproof make up! ðŸ˜€

The Verdict:

  • It’s great for anyone with dry or sensitive skin.
  • For anyone with oily skin – use at night before moisturizing and as part of your make up removal routine.
  • I love this product personally, I use it every night and more than what it does, Cetaphil is great because of what it doesn’t do. And if its good enough for a baby’s skin its good enough for mine ðŸ˜€
th or so. When I was a teen my skin looked like a battlefield. Oh the horror! I live in Mumbai and I have to take extra care to protect my skin from the Mumbai pollution and humidity, although currently I am overseas and believe me I can see the difference geography makes to the condition of my skin – Go figure :S
What Cetaphil Skin Cleanser Claims
Originally developed by dermatologists especially for sensitive skin, Cetaphil Gentle Skin Cleanser is a soap substitute that preserves your skin’s natural protective oils. Cetaphil Gentle Skin Cleanser softens your skin as it gently cleanses. Independent clinical tests using Cetaphil® Gentle Skin Cleanser undiluted has shown it to be one of the gentlest non-soap cleansers. Its special formulation won’t sting your eyes and can remove light make-up without clogging pores. Developed to be used with or without water, Cetaphil Gentle Skin Cleanser is pH balanced and lanolin and fragrance free. Suitable for: All skin types, infants, eczema, acne, rosacea & psoriasis.
Will I repurchase?
Yes !! 5 starts 

Canmake Marshmallow Finish Powder Review


If you are seeing yourself holding this powdered Canmake Marshmallow Finish Powder in your hand and asking yourself how you powdered it, I can only share one sentence: This is not just a make-up box But also a box of powder makeup super good! I say this is not because I was a Japanese cosmetic jolly because before I did not use a lot of Japanese cosmetics, only a bottle of oil and a facial treatment of DHC . The products I use are pretty good, but if you really like it, you must mention the powder from the Canmake cosmetic brand.

Let's open enough that enough, we go to the right part is to review Canmake powder right.
First of all, it's about design, just like the can of Canmake , when you look at Canmake Marshmallow Finish Powder. Not very good. I myself find this type of box more suitable for mom or auntie or girlfriend like the feminine "princess". The gold box carved simple pattern with the words CANMAKE, it is acceptable to accept it, not to the point where dear seldom.
However, the look really does not say it all. The powder inside of Canmake Marshmallow Finish Powder Powder is quite smooth, when using a piece of cotton wool, it falls out but does not matter. Powdered skin is quite good, but you should spend 3 miles to ensure the coverage achieved the best dark skin.
In this review of CanMake Powder, the highest rating in Canmake Powder Powder Marshmallow Finish Powder is the ability to tone and tone the skin oil perfectly. It is a good make-up powder. When you apply only the first powder, no matter how many layers of oil on your skin, you will lose it. Another point that made me "fall in love" is the ability to raise skin tone, lifting it slightly and gradually creating a natural feeling, not excessive white. For myself, the 3 layers are perfect enough to conceal your skin. Although I also found myself a three-tier miles is quite a lot but I feel the face is not heavy or uncomfortable but still looks natural. Actually since the purchase of this powder I used it quite often, used every day always, and until now I have not intended to switch to another type that is only loyal to her now. My skin is white but not rosy, so I use MO and blush with blushTo add a little vitality. So you have the same skin you can refer to this MO color home.
With what this powder brings, the next time I will have to "crooned" other products of Canmake cosmetics too impressed so good that. This review of my Canmake Charm is long overdue, hopefully this article will help you choose a good cheesecake.

Article : Makeup Tips and Tricks For Battling Oily Skin


Let’s face it: we all know how to put on makeup. But when it comes to your skin type, there are certain tips, tricks and tools to make it a little easier to look your best. With oily skin, a few quick steps of preparation and the right items can upgrade your basic makeup job into wow-where-did-she-come-from status. We reached out to Romy Soleimani, Beauty Director-at-Large for Beauty.com, to get her favorite advice for makeup application on oily skin.

Tone It Up
Skin prep is super important for oily skin, and using the right toner will help balance out the oiliness. Jurlique Citrus Purifying Mist is a must-have: it will leave your skin feeling feel hydrated, not oily. It’s magic!

Less Is More
A great trick to eliminating oiliness in the skin is to reduce the number of layers of product you wear on your face. Original Foundation from Bare Minerals contains SPF 15, which allows you to cut out the layer of sunscreen you would usually apply before makeup.

ACP = Always Carry Powder
Everyone with oily skin knows it’s key to keep powder with you at all times! In order to avoid the caked-on-powder look, go with a mineral-based product like Mineral Makeup from Prescriptives. The powder will absorb oil while it keeps your face looking even, natural and shine-free.

Prep Your Face With Primer
A great makeup tip for fighting oily skin is to mattify! Applying a matte primer before your makeup helps absorb oils throughout the day. Make sure to use it everywhere that you’ll be applying makeup – even your eyelids. 

Stay Beautiful With Matte Blush
If you have oily skin, shine is your worst enemy, but that doesn’t mean you can’t create a beautiful makeup look with definition and color. I like to use a matte blush like By Terry Blush Veloute in Apple Glow; it easily absorbs into foundation or powder and leaves a gorgeous, matte finish.

Eat clean : Banana Nut Mug Cake


Credit to, Cassey via Blogilates.com :)
Hey guys!
It’s a new Cheap Clean Eats and I’m showcasing another mug cake! Woot! Love these because they literally take no time to “bake”. Today’s recipe is the Banana Nut Mug Cake with a surprise center filling! So cool. Here’s what you’ll need:
INGREDIENTS
Surprise filling:
– 2 tablespoons vanilla Greek yogurt
Cake:
– ¼ cup rolled oats
– ½ ripe banana, smashed
– 2 tablespoons Greek yogurt (plain or vanilla)
– 1 egg
– 2 tablespoons almond milk
– 2 packets zero calorie sweetener sweetener
– ½ teaspoon baking powder
– pinch cinnamon
– 1 tablespoon crushed walnuts
DIRECTIONS
1. Fill a foil muffin cup with the 2 tablespoons vanilla Greek yogurt and freeze for 2 hours (or overnight) until solid.
2. Spray a large mug with cooking spray.
3. Mix together the oats, banana, Greek yogurt, egg, almond milk, sweetener, baking powder and cinnamon.  Stir well.
4. Microwave for 1 minute.
5. Remove and press the frozen yogurt disk in the mug and press down slightly.
6. Return to microwave for another minute or until just set.  (If you like your cake under-done, pull it out sooner.  If you like it firm and more like a muffin, keep it in longer).  Sprinkle with walnuts.  The center should ooze out slightly if you don’t over-cook it.
Calories: 293 | Protein: 14 g | Net Carbs: 29 g | Fat: 12 g | Fiber: 4 g

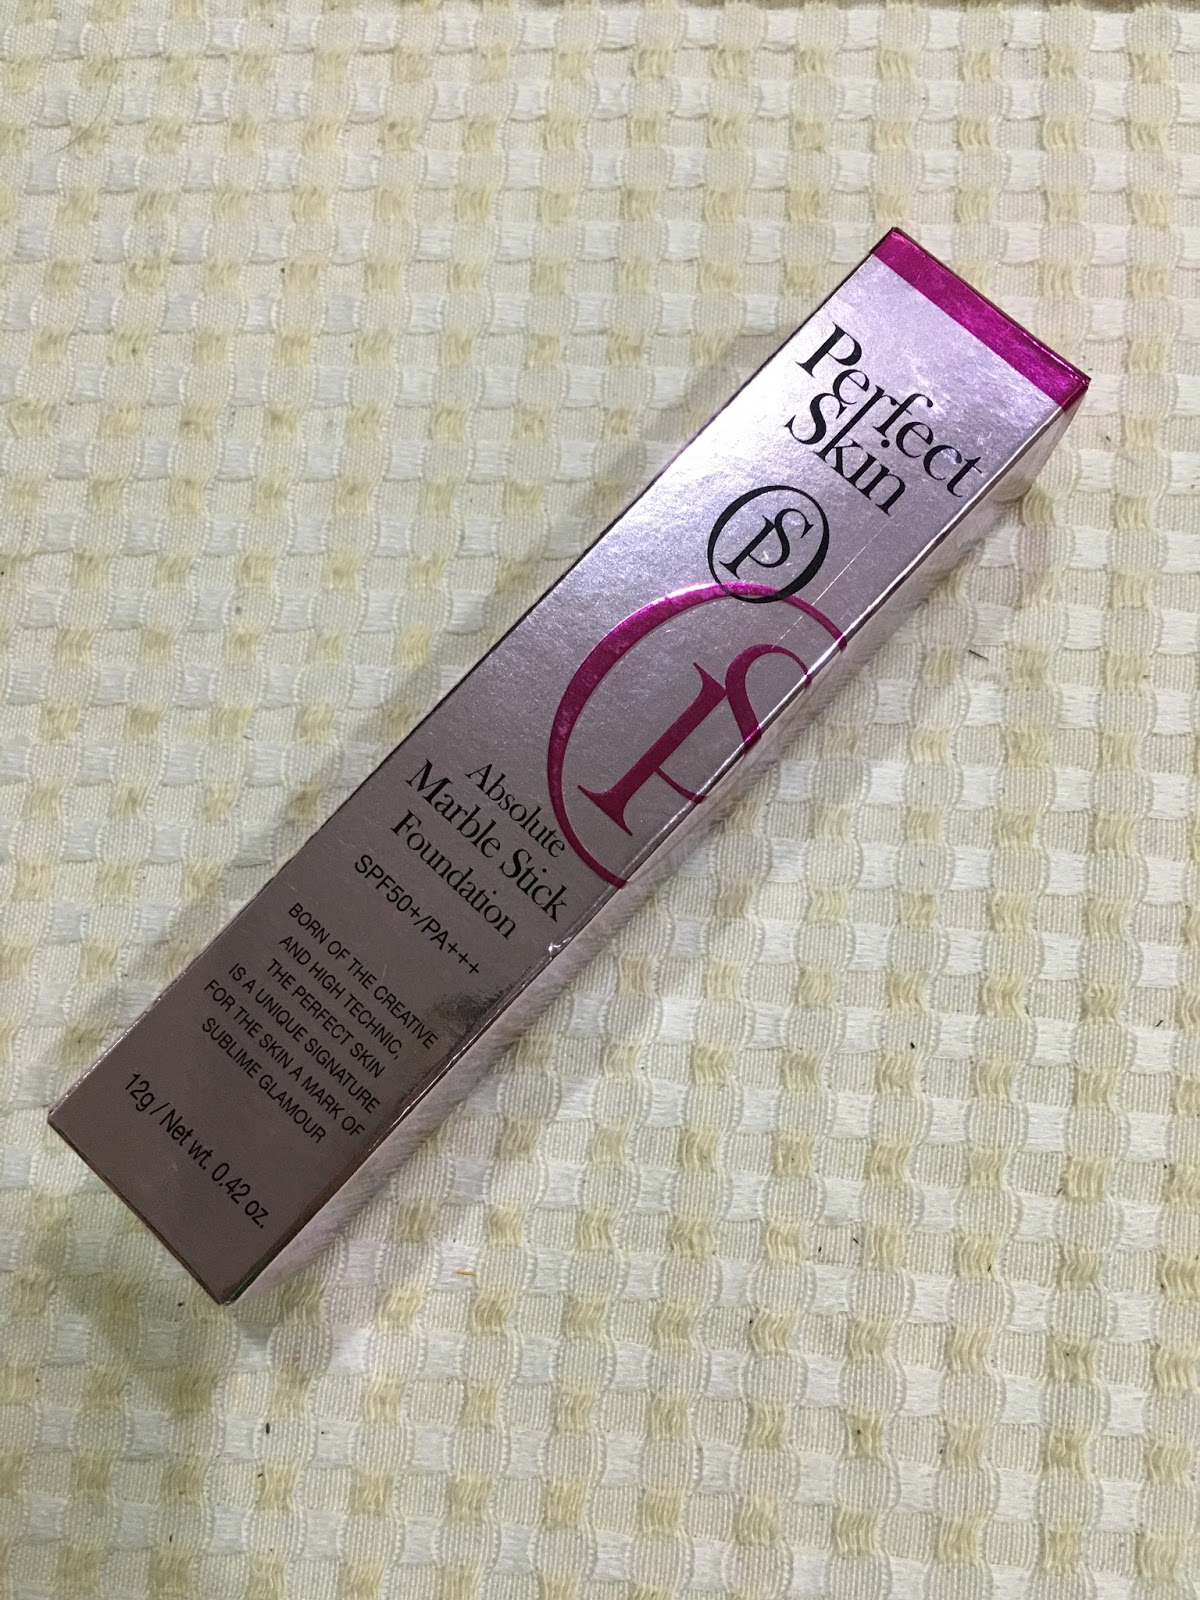
REVIEW : PERFECT SKIN ABSOLUTE MARBLE STICK FOUNDATION

Hello readers,

I barely use foundation as my makeup routine. But I would like to give this
Perfect Skin Absolute Marble Stick Foundation SPF50+/PA+++
a try. And I choose color code  #21 Pink Beige. 
This foundation born of the creative and high technic, the perfect skin is a unique signature
for the skin a mark of sublime glamour.


My verdict :

Okay, as for me this foundation is easy to apply. and also easy to blend. but somehow my skin feels irritated when using the brush. so, im just using my beauty blender to apply this foundation. 
although this stick foundation has mirror on the back, but the mirror is too small. for me its useless.
i used to have combination skin and this foundation works well with that. not make my face looks oily anyway. beore i apply this foundation, i apply primer first just to make it blends well then.
anyway, the colour is not quite suitable for my face. it makes my face whiter and not natural,
so i need to cover with loose powder then. but overall, it is a good foundation. and 
has a nice smell too.

I just bought this foundation in :
Hermo.my


KLFW16 : Diana Rikasari

hello people,

 photo bb_zpsvokiuh2m.jpg

 photo b_zpscwwqfn8q.jpg

 photo aaaaa_zpsdexdyloh.jpg

 photo gggg_zps53vhg9uq.jpg

I really love all her collection. So funky, cheerful and beautiful.
"Dreams do come true, even when they are so random and wild. I've always thought about having a clothing line but never thought it was ever going to come true, moreover given the opportunity to make its debut in such a grand event abroad. And it did. Schmiley Mo is my tribute to girls out there who believe that fashion should be fun and easy but at the same timemodest. Yes, the word "Mo" is actually derived from the word "modesty" because I believe inless-skin is more.

Anyway, my first experience backstage was pretty frightening hehe. I even asked the stage choreographer, "can I hug you?", to which she allowed me to hehehehehhe. But I am happyyyyy because I learned so much! My models were also very kind, so that was helpful. And hey, Tutifrom Asia's Next Top Model walked for Schmiley Mo too! OMG! #fangirling" - Diana Rikasari <3

Review : Innisfree Jeju Sparkling Mineral Mist

Hello readers ;


What it is ... 
[Jeju Sparkling Mineral Mist] 
A Jeju sparkling mineral water mist that delivers rich mineral nutrition for a clear complexion.

1. Strengthens your skin's moisture-retaining power 
Finely textured stabilized oil extracted from coconut helps the skin to retain moisture without feeling oily. 
2. Contains 90% sparkling mineral water 
Contains a high carbonic acid and nourishing mineral content from the sparkling mineral water found in Sanbang Mountain on Jeju to deliver hydration deep into the skin, like filling it with moisture from the inside.
 
3. Mist of sparkling mineral water 
Fine-textured sparkling mineral water particles sit gently on the skin to moisturize and soothe it like it has been soaked in a hot spring.

 
What else you need to know ...
[Jeju Sparkling Mineral Line] 
Jeju Sparkling Mineral Line provides deep hydration to the skin with carbonated minerals from the sparkling mineral water drawn from UNESCO Global Geopark-designated Sanbang Mountain on Jeju Island for a clear skin like it's been soaked in a hot spring. 

[6-free system] 
Free of parabens, animal ingredients, mineral oil, colorants, artificial fragrance and imidazolidinyl urea.

Ratings :
5/5

Review : Laneige Pore Deep Clearing Foam


- Works into micro bubbles that cleanses deep inside pores and larger bubbles that cleanses the surface. Leaves your skin clean and oil-free. 
 
- Moroccon Clay (Rhassoul) works as micro scrubbing beads that purify skin, while Clove extract controls sebum secretion to leave your pores clean. 
 
- Contains mild plant-based cleansing ingredients for gentle cleansing. 
 
- Pore Purifying Complex removes toxins and impurities around your pores and strengthens your defense system against pore-related troubles.

Pros :
Really clean your pores
Smell fresh
Can use up until 2 months

Cons :
Not suitable for dry skin

Ratings :
3/5

Tips : The professional order to apply your makeup and skincare

Hello readers 


Applying our beauty products should be a dream sequence of pampering that sees us massage our faces with all kinds of sumptuous oils and creams. So why do we feel uncertainty when it comes to smoothing our eye cream on? We'll tell you why; because the order of applying beauty buys is baffling.
And with skin essences soon to enter the beauty arena thanks to Korean rituals, product layering is only set to get even more confusing. Which is why we've pulled together a guide on the perfect order for all of your products which ensures you get the the optimum effects from your serums and sunscreens.

1. CLEANSE

Rinse and repeat this step to rid your skin of every scrap of dirt; the first cleanse attacks the surface grime while the second will reach right into your pores.

2. TONER

Skipping toner is like writing your dissertation then quitting before you've saved it; it makes all the effort of cleansing pointless as residual dirt may still remain. Sweep one on with a cotton pad to clarify your pores.

3. SPOT CREAM

If you use any type of topical treatment to blitz acne or lighten scars, apply these now to let your skin soak up their benefits.

4. SERUM

The general rule with face creams is that you should start with the lightest products first, and serums boast thin formulas that absorb the most efficiently. These concentrated lotions deliver active ingredients deep into pores, so ensure you're using one that caters to your biggest skincare woes.

5. EYE CREAM

How many of you were making eye cream the last step in your skincare regimen? In fact, it goes on before your moisturiser, oil and SPF. Much like serums, these lotions are thin and need to be clear of barriers, so pat one on before your face cream, using the pad of your ring finger.

6. MOISTURISER

Moisturiser is non-negotiable - even if your skin is oily - so reach for a tub of the creamy stuff and massage it in an upwards and outwards motion.

7. OIL

If you hope to reap the pore-plumping, skin-brightening benefits of a facial oil, pat one over drier zones to seal your moisturiser down. While oil is one of the few products that's able to penetrate your face cream, the same can't be said when the two products are applied in the opposite order.

8. SPF

Applying SPF straight after cleansing will render the rest of your products useless, but popping it on at the end ensures your regimen can still work to its full potential.

9. PRIMER

The correct order comes into play to save your makeup regimen as well, ensuring you get the most flawless wear from your foundations and colourful pigments. Kicking this off is a good primer, which acts like a magnet to hold down your base and, thanks to new advances, can tackle problems like spots and oiliness, too.

10. FOUNDATION

There are many myths surrounding the application of concealer, but to get the best from your cover-up, you need to smooth on your foundation first. Lay your initial base down in a light, thin layer for a natural look, and you can then use step 11 to go over any blemishes.

11. CONCEALER

Evaluate the parts of your face that may want some extra cover-up, then dab your concealer on with a brush and lightly blend it out.

12. BRONZER THEN BLUSHER

Tawny bronzing powders and creams are designed to etch in gentle structure, so do this before defining your cheeks with a pretty wash of blusher.

13. EYESHADOW AND EYELINER, THEN MASCARA

Lacquered lashes can get in the way when trying to nail a feline flick, so slick on your mascaraafter applying your shadow and liner.

14. BROWS

The intensity of your brows should complement your eyeshadow, blusher and lipstick, so grab a pencil and get to work on matching them with the rest of your look.

15. POWDER

Your face powder is designed to set your makeup and soak up excess oil, so save it for last to sweep over shiny t-zones, chins and under-eyes to set concealer.

Recipe : The Best Watermelon Slushy Ever

Hey guys!


2016-06-28 12.26.39
I’m hoping you’re taking advantage of the last weeks of your warm summer months by being outside, and maybe getting some outdoor workouts in on the beach or by the lake! There’s something about the fresh air and warm heat that feels extra healthy to me. Maybe it’s the extra sweat, or being one with nature, but no matter what it is, it’s a great feeling.
You know what else feels AH-MAZING?! Cold slushy drinks post-workout, especially if you are feeling dehydrated from the hot sun. There’s nothing more hydrating than watermelon and coconut water, and nothing tastes quite as good as freezing cold watermelon goodness! The texture is perfection!
It’s different from a smoothie, which has a creaminess to it. These slushies have more of a sorbet essence, and they taste just like a fresh watermelon. I like to add fresh basil to mine to add a punch of “herbiness” to contrast the sweetness (I know, it’s not a word, but it should be, because herb-y is what it is!). There are two ways to make these.  I’ll call one the fast version and one the slow version. The slow version can also end up like a shaved ice, so if you want to eat it with a spoon, be sure to try that version!
WATERMELON COCONUT WATER SLUSHY
Yield: 1 serving
Serving Size: 1 slushy
Prep Time: 5 min
(Fast Version)
Ingredients:
  • 3 cups cubed watermelon, frozen overnight
  • 1/2 cup coconut water
  • 1 1/2 tablespoons lime juice
  • 1 tablespoon honey
  • 6-7 basil leaves
Method:
  1. Place ingredients into a high-powered blender, and process until slushy, scraping sides several times to incorporate.
Nutrition Info:
Calories: 229| Protein: 4g | Fat: 1g | Net Carbs: 55g | Fiber: 3g
WATERMELON SLUSHY
Yield: 1 serving
Serving Size: 1 slushy
Prep Time: 5 min
Chill Time: 4-6 hours
(Slow Version)
Ingredients:
  • 3 cups cubed watermelon
  • 2 tablespoons lime juice
  • 2 tablespoons honey
  • 6-7 basil leaves
Method:
  1. Place ingredients into a high-powered blender and process for 15 seconds.
  2. Pour contents into a shallow dish and cover. Place in freezer, and stir after 2 hours. Check after 4 hours to see if it’s frozen and slushy.  If not, stir and return to freezer for 2 more hours, spoon into a glass, and serve.
  3. If desired, leave in freezer overnight, then scrape the frozen watermelon with a fork to make shaved ice. Ejoy with a spoon!
Nutrition Info:
Calories: 271| Protein: 3g | Fat: 1g | Net Carbs: 69g | Fiber: 3g
What’s your favorite frozen treat? Comment below!
*sources from : Blogilates :)